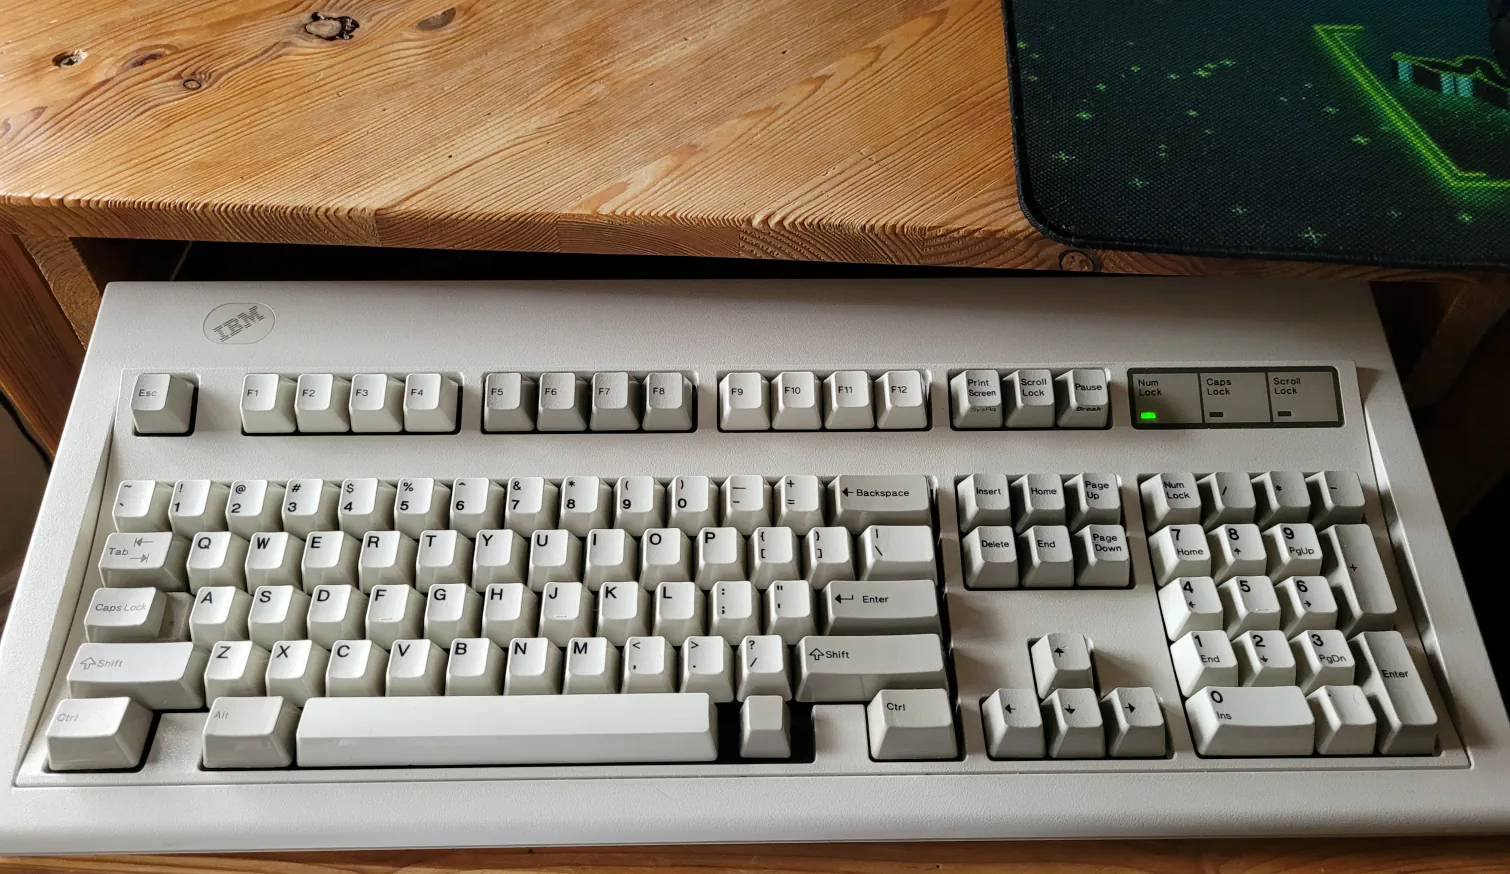
When I found my M122 it was not in good shape, and I asked my boss if I could have it since it clearly hasn't been used in years. He agreed and I began to research how to restore such a keyboard. The first step was a cleaning process since it was absolutely disgusting when I found it. The keyboard was covered in ancient dust and grime, covered in marker and pen ink, and missing key caps. Another issues I would face is that the keyboard uses an 8P8C connector.
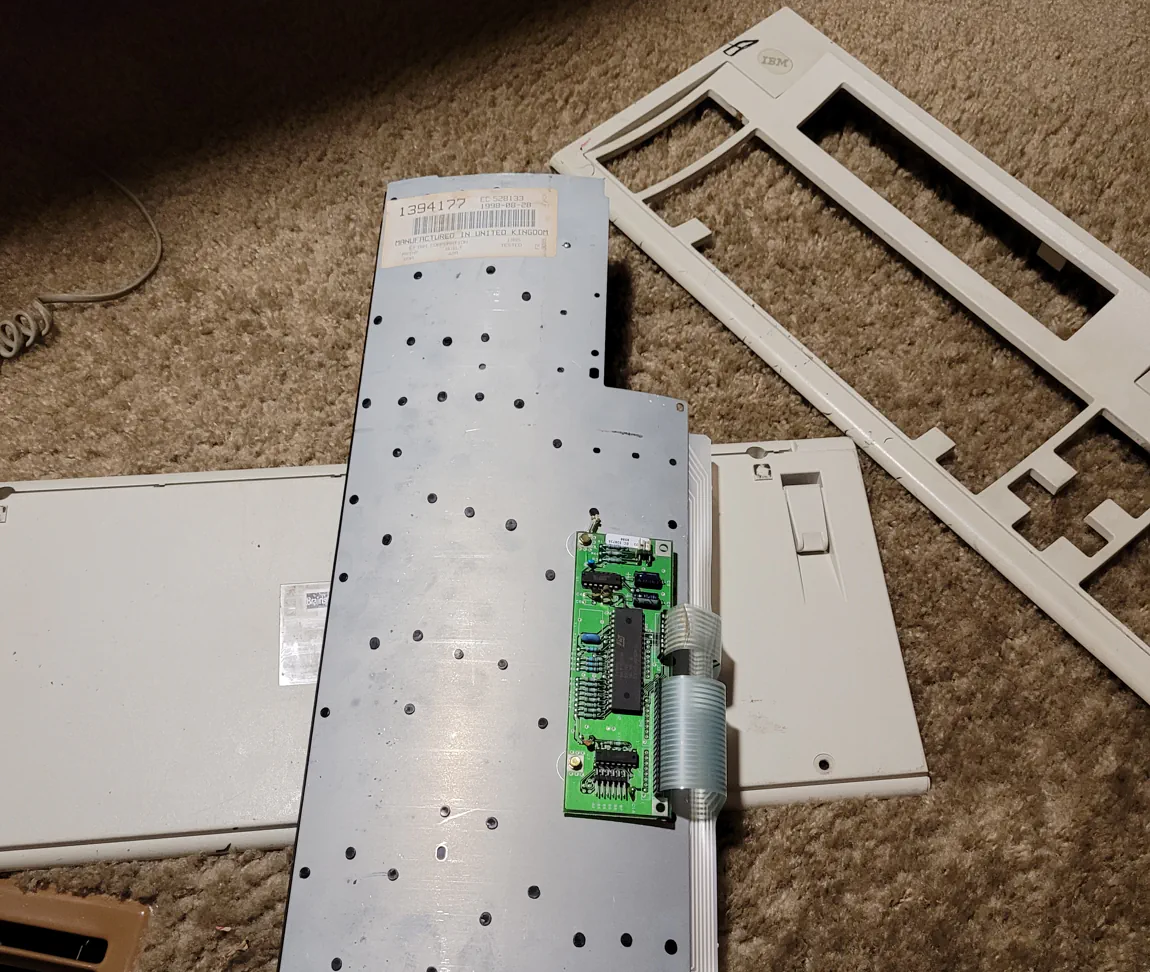
In order to clean the keyboard, I first needed to disassemble it. This could only be done once I took out the screws. Sadly, I did not have a compatible driver, nor did any hardware store I could find. To take off the back panel I would need a hex driver, but I was not sure which one driver. I was able to borrow a kit from my other place of employment and through trial and error I discovered I needed a 5.5 mm hex driver. Upon first disassembly of the keyboard, I was finally able to find a part number on the birth certificate of the keyboard. This M122 was made 28. August 1998 by IBM in the UK. It is P/N 1394167 but really has an Assembly Part Number of 1394177. I put the keyboard back together and returned the driver to my place of work the following day. Using the new identifying information, I had now found I began more researching and was able to put together a plan on how to clean and restore the keyboard to working order. The first step was to order a precision driver kit which I did. Now I was able to open the keyboard whenever I needed.
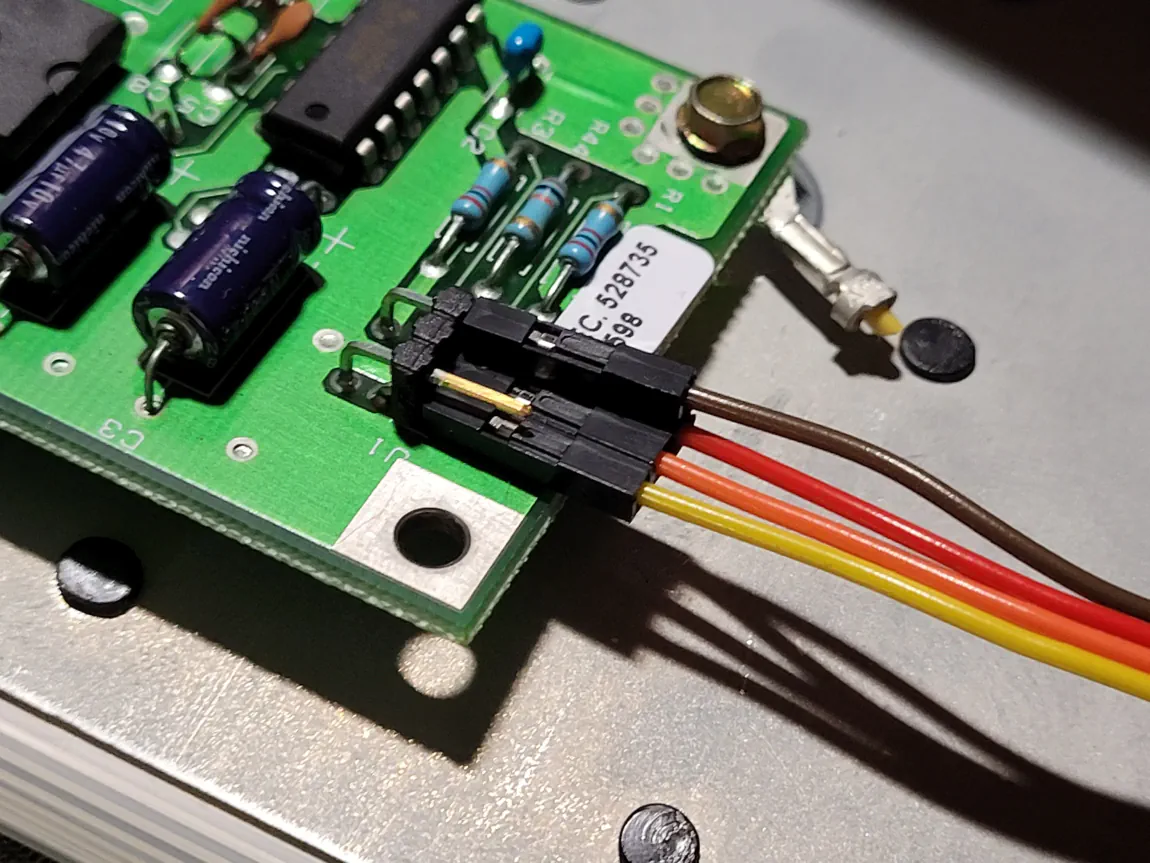
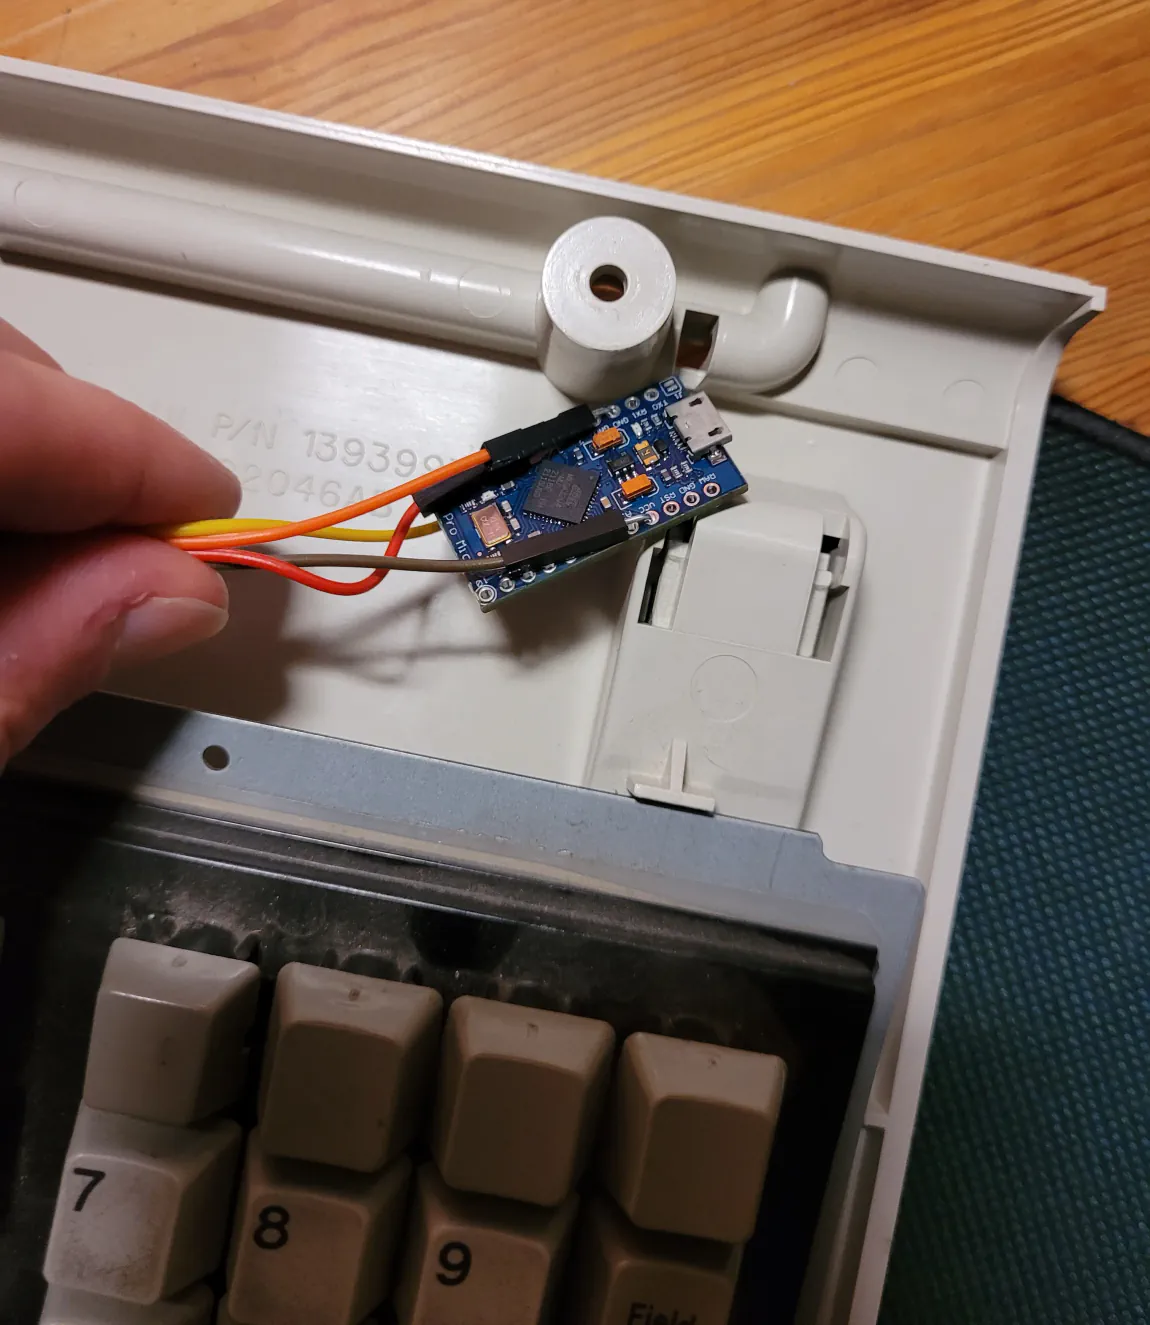
Before beginning to clean the keyboard I first wanted to see if I could even get it working again. But because I do not have any devices that connects to a keyboard over an 8P8C connector I needed to make an adapter first. In my research I came across a device called a Soarer's Converter. This is a little device that will actively convert the signals from the M122 to a USB keyboard signaling. To build my Soarer's Converter I used a Pro Micro Arduino clone. It is a little microcontroller that uses an ATmega32U4 processor. It uses the firmware written by this person by the name of Soarer and uses a custom config I wrote for the M122 Battlecruiser. This custom config was needed because there is certain key that do not work. While testing I found that the left shift key does not respond. Therefore, the translation microcontroller will press a shift key when the play button left of the shift key is pressed. To connect the convert to the keyboard a female-male dupont cable is used. The female end of the dupont cable is used to connect to the pin out on the PCB of the keyboard. Then the male ends of the dupont cable are bent over and soldered into the through holes of the Pro Micro. Then the converter is connected to a USB cable with a micro-B connector on the keyboard side and a type-A connector on the PC side. Then once I was able to get the converter to work and I was able to confirm that the keyboard works. The next step was then to clean the keyboard. The task was split into two section, the parts that can tolerate water, and the parts that cannot. For the upper and lower chassis, they were washed in the tub with soapy water. It was very challenging to get all the ink off and some of it I had to leave on. The back plate, barrel plate, membrane, and springs needed to be cleaned with 99% isopropanol. The barrel plate was absolutely covered in ancient dust and grime. It took many cotton swabs and cotton balls to remove it all.
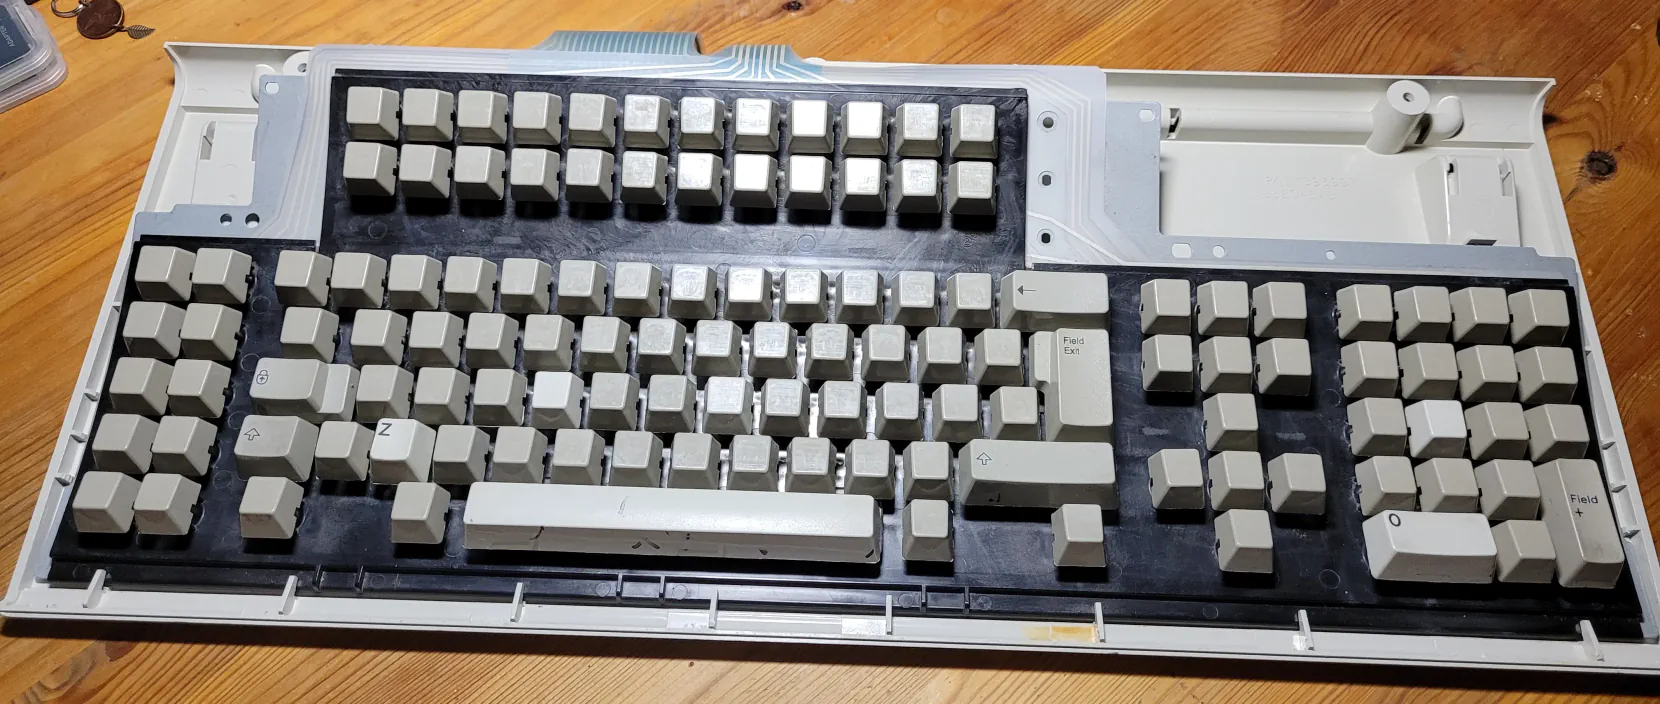
The back plate, barrel plate, membrane, and springs needed to be cleaned with 99% isopropanol. The barrel plate was absolutely covered in ancient dust and grime. It took many cotton swabs and cotton balls to remove it all. While I was scrubbing away at the barrel plate, they key stems and the key caps were soaking in a light soapy water bath. I made sure to use distilled water so that there would be no friction causing mineral deposits on the keys when they dried. I would stir the key soup every ten minutes or so just to try and get as much gunk to soften up and get washed off of the keys. Then I laid out the keys on a towel and set up a fan to blow air across then to speed up the drying process. I left them like this for 24-48 hours. To check if all the water has evaporated, I blew into the base of the key stems, if I felt water droplets spray back into my face then I knew they were not yet dry.